Example: Create Sample Library
In this chapter we will create an example library consisting of an MMI built with a box and linear tapers. This example builds on FreePDK45 technology. Therefore, please get the KLayoutPhotonicPCells/FreePDK45_tech package from the KLayout package manager. The finished file of this example can
be found here MMI_Example. This file can be copied into the KLayout pymacros folder (~/.klayout/pymacros/) and executed.
Code Explanation
All photonic libraries are derived from PhotDevice.
As an example, we will use a modified FreePDK45_Cell. We will create a 2x2 MMI. To create a new PCell Library open the MacroDevelopment of Klayout in the menu Macros->MacroDevelopment.
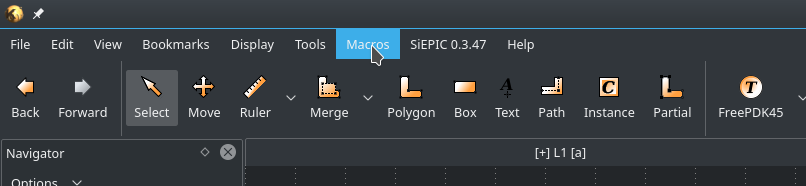
Fig. 3 Open the IDE through 
This will open the KLayout Ruby/Python/DRC IDE. In the left sidebar choose Python as a language. In the menu choose new (second to the left, the plus sign) to create a new script/library.
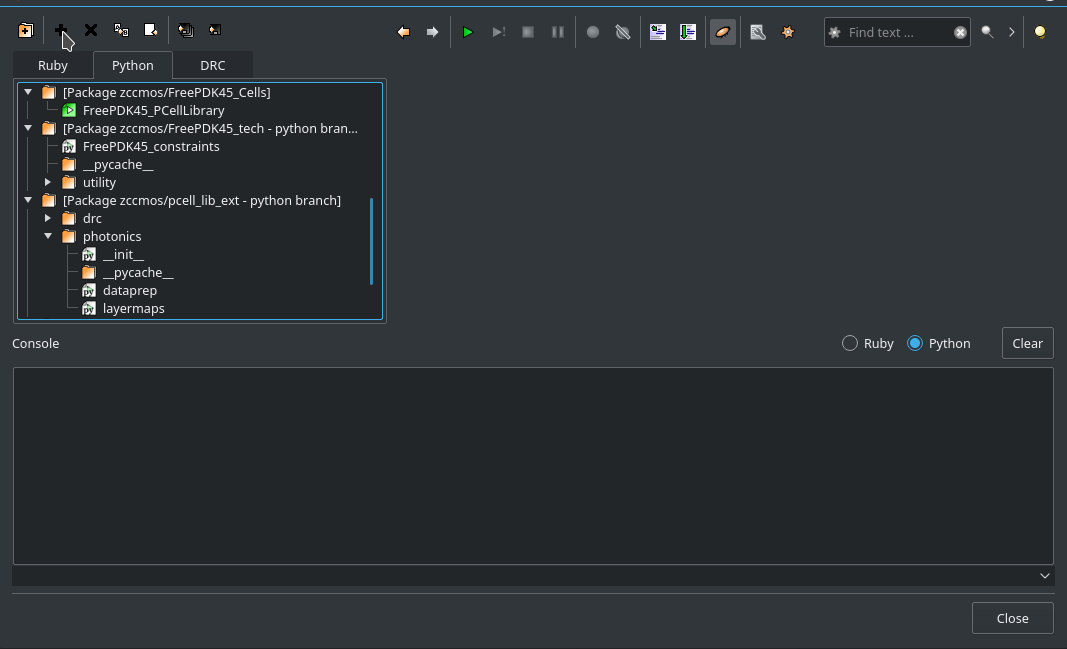
Fig. 4 Add a new PCell template from the Context
From the opening context choose PCell template (Python). This will create a new .lym file for a PCell-Library. The generated sample code is irrelevant for us as we will not use KLayout syntax, but the extension. The reason for choosing the PCell Sample instead of an empty template is, that it will be flagged as a PCell library in the background.
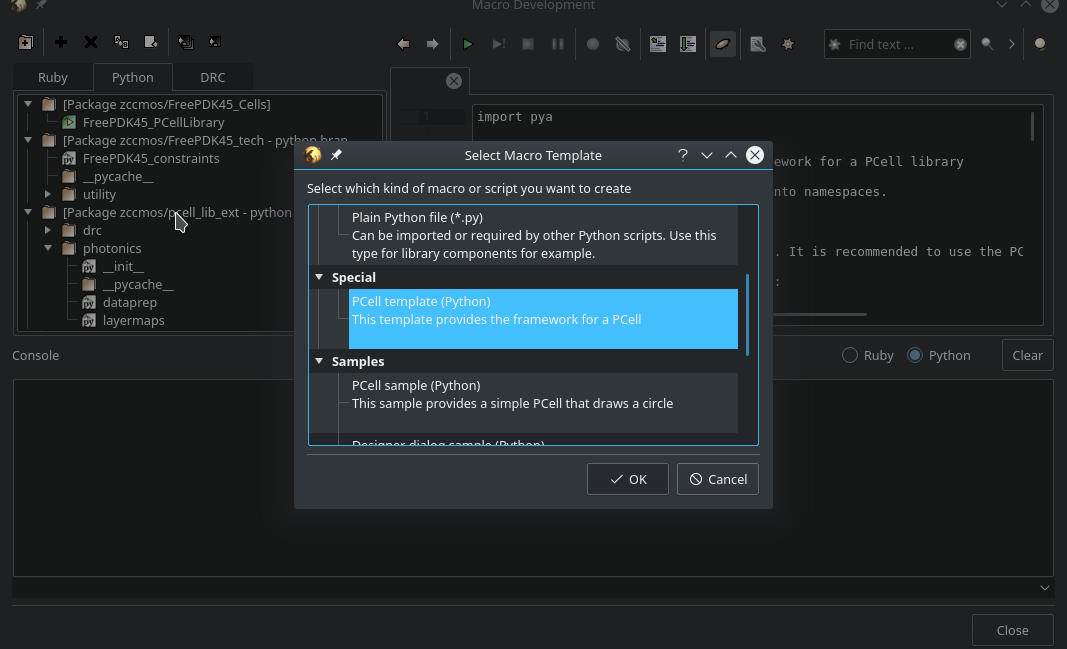
Fig. 5 Choose PCell template (Python)
As a next step delete all example code. The new cell will be created from scratch. Reason for using the sample PCell is that KLayout uses some flags to define it as a PCell library.
First let’s import modules we will need.
1 2 3 4 5 6 | import pya
import math
from kppc.photonics import PhotDevice, PortCreation
import kppc.photonics.layermaps as lm
import numpy as np
import os
|
After the imports we will create a helper class. The class kppc.photonics.PhotDevice is technology-independent and thus needs to be supplied with information about layers, i.e. how to map layers during dataprep and finally about the constraints for the DR-Cleaning. So let’s define a helper class that all of our FreePDK45-PCells will use.
9 10 11 12 13 14 15 16 17 18 19 20 21 22 23 24 25 26 27 28 29 30 31 32 33 34 35 36 37 38 39 40 41 42 43 44 45 46 47 48 49 50 51 52 53 54 55 56 57 58 59 60 61 62 63 64 65 66 67 68 69 70 71 72 73 74 75 76 77 78 79 80 81 82 83 84 85 86 87 88 89 90 91 92 93 94 95 96 97 98 99 100 101 102 103 104 105 | class FreePDK45Example(PhotDevice):
"""Class that provides technology specific data. Currently the backend needs 3 things to be supplied by
the technology of the PCells.
As these are independent of specific PCells and parameters this should not give any difficulty with the requirement
of Klayout to have the Classes stateless.
The layermap was created from a forum suggestion
(`Post <https://community.cadence.com/cadence_technology_forums/f/custom-ic-design/37021/
layer-map-file-for-gds-transfer-to-virtuoso>` ) and then some layers were added by hand.
layermap: A dictionary containing layers with available purposes, which provide a layer/purpose. This is
loaded from a .layermap file.
Example of this FreePDK45:
{'active': {'blockage': (1, 1), 'drawing': (1, 0)},
'pwell': {'blockage': (2, 1), 'drawing': (2, 0)},...}
:ivar dataprep_config: Filepath to a text file containing rules for dataprep. This file contains rules for
the dataprep.
Copied from the example dataprep.txt:
File Format:
File defining operations for dataprep
Format:
<operation> <source layers> <destination layers> <sizing amount in microns>
Operations supported: add,sub
* add: Create a region from all shapes of the source layers and combine this region with each
destination layer region separately
* sub: Same as add but don't build combination but cross-section instead
Sizing amount uses the klayout sizing operation to size the regions of the source layers
During dataprep the regions are merged, meaning overlapping polygons will become one Polygon
source/destination layers are separated by commas if there are multiple
Each argument is separated by white spaces. How many should not matter as they will be parsed by a
python str.split() operation which should be able to handle any white space amount.
If the first word of a line is not a supported operation the line will be ignored
The lines will be executed in order meaning and add sub operations on layers will be different than
a first sub and then add.
:Examples:
add active.blockage,poly.blockage,metal1.blockage,metal2.blockage,metal3.blockage,metal4.blockage,
metal5.blockage nwell.drawing,nimplant.drawing 2.0
:ivar clean_rules: list containing the layer/purpose numbers and the minWidth/minSpacing rules for
the layer/purpose pair in microns
:Examples:
[[(1, 0), 0.097, 0.077],[(2, 0), 0.23, 0.189],[(3, 0), 0.169, 0.196],
[(5, 0), 0.044, 0.052], ...]
"""
# Define the metals & via names. They will be used in some PCells (Electrodes and ViaStack)
metal_names = ['metal' + str(i) for i in range(1, 11)]
via_names = ['via' + str(i) for i in range(1, 10)]
def __init__(self):
PhotDevice.__init__(self)
techpath = pya.Technology.technology_by_name('FreePDK45').base_path()
filename = techpath + '/FreePDK45.tf'
# Check if techfile is correctly imported and located
isfile = os.path.isfile(filename)
if not isfile:
import sys
msg = pya.QMessageBox(pya.Application.instance().main_window())
msg.text = 'Please import the techfile of the technology to {}' + \
' before using the module and reopen KLayout'.format(filename)
msg.windowTitle = 'ImportError'
msg.exec_()
tech = con.load_from_tech(filename)
# Get the layermap file and load it.
# CAREFUL: Will be used for dataprep and others
self.layermap = lm.load(techpath + '/FreePDK45.layermap')
# This variable will be imported by the dataprep algorithm
# CAREFUL: Will be imported for dataprep
self.dataprep_config = techpath + '/dataprep.txt'
# Rules for the cleaner in the form [[(layer1,purpose1),violation_width1,violation_space1],[(layer2,
# purpose2),violation_width2,violation_space2],...]
# ## CAREFUL: This variable will be imported for the cleaning.
self.clean_rules = [[(1, 0), 0.111, 0.085], [(2, 0), 0.23, 0.188], [(3, 0), 0.14, 0.199],
[(5, 0), 0.044, 0.049],
[(4, 0), 0.046, 0.052], [(9, 0), 0.044, 0.062], [(11, 0), 0.076, 0.077],
[(13, 0), 0.073, 0.089],
[(15, 0), 0.067, 0.063], [(17, 0), 0.143, 0.137], [(19, 0), 0.158, 0.14],
[(21, 0), 0.145, 0.123],
[(23, 0), 0.514, 0.535], [(25, 0), 0.369, 0.311], [(27, 0), 0.908, 0.843],
[(29, 0), 0.347, 0.771],
[(1, 1), 1.247, 1.254], [(2, 1), 0.976, 0.905], [(3, 1), 1.165, 1.304],
[(5, 1), 1.073, 0.958],
[(4, 1), 1.058, 0.885], [(9, 1), 0.892, 0.825], [(11, 1), 1.003, 0.682],
[(13, 1), 0.983, 0.73],
[(15, 1), 1.086, 0.993], [(17, 1), 1.12, 0.812], [(19, 1), 0.941, 0.765],
[(21, 1), 0.942, 0.889],
[(23, 1), 1.044, 0.933], [(25, 1), 1.096, 1.039], [(27, 1), 0.798, 0.937],
[(29, 1), 1.001, 1.286]]
|
This is our basic class. Now let’s create two basic PCells. First a linear taper and second a box. A box combined with 4 tapers will build a 2x2 MMI. To connect them we will use ports. The liner taper will have two ports, one on each side. The box will have four ports and each port of the box is the same size as the big part of the taper.
109 110 111 112 113 114 115 116 117 118 119 120 121 122 123 124 125 126 127 128 129 130 131 132 133 134 135 136 137 138 139 140 141 142 143 144 145 146 147 148 149 150 151 152 153 154 155 156 157 158 159 160 161 162 163 164 | class ExMMIBody(FreePDK45Example):
"""MMI Body. Since this should be a 2x2 MMI it will have 4 ports
"""
def __init__(self):
FreePDK45Example.__init__(self)
self.add_layer('lay', "phot_silicon.drawing")
# Important: If it should be a floating point parameter, use x.0 instead of x for default values that fall on
# integers, or it will be interpreted as integer
params = dict(length=15.,
width=5.,
port_offset=1.5,
port_width=1.0
)
# Register the parameters
self.add_params(params)
def create_param_inst(self):
# Create Ports here
ports = [PortCreation(-self.length / 2, self.port_offset, 180, self.port_width),
PortCreation(-self.length / 2, -self.port_offset, 180, self.port_width),
PortCreation(self.length / 2, -self.port_offset, 0, self.port_width),
PortCreation(self.length / 2, self.port_offset, 0, self.port_width)]
return ports
def shapes(self):
# Create the Rectangle
self.create_polygon(
[[-self.length / 2, -self.width / 2], [self.length / 2, -self.width / 2], [self.length / 2, self.width / 2],
[-self.length / 2, self.width / 2]], self.lay)
class ExLinTaper(FreePDK45Example):
def __init__(self):
FreePDK45Example.__init__(self)
self.add_layer('lay', "phot_silicon.drawing")
params = dict(width_0=.5,
width_1=1.0,
length=2.0,
)
self.add_params(params)
def create_param_inst(self):
# Create left and right port
port_0 = PortCreation(-self.length / 2, 0, 180, self.width_0)
port_1 = PortCreation(self.length / 2, 0, 0, self.width_1)
return port_0, port_1
def shapes(self):
# Create taper polygon
self.create_polygon([[-self.length / 2, -self.width_0 / 2],
[-self.length / 2, self.width_0 / 2],
[self.length / 2, self.width_1 / 2],
[self.length / 2, -self.width_1 / 2], ],
self.lay)
|
Note
If we only declare one PortCreation in self.create_param_inst(self), we have to return it as: return [port]
Now let’s declare the MMI. In it we will create 4 instances of tapers and one box and then connect the tapers to the box.
167 168 169 170 171 172 173 174 175 176 177 178 179 180 181 182 183 184 185 186 187 188 189 190 191 192 193 194 195 196 197 198 199 200 201 202 203 204 205 206 207 208 209 210 211 212 213 214 | class Ex2x2MMI(FreePDK45Example):
"""The MMI-cell class.
This class instantiates a body with 4 tapers and attaches the tapers to the the body.
"""
def __init__(self):
FreePDK45Example.__init__(self)
self.add_layer('lay', 'phot_silicon.drawing')
params = dict(wg_width=.5,
length=15.0,
taper_width=1.0,
taper_length=2.0,
width=4.0,
taper_offset=1.0,
)
self.add_params(params)
def create_param_inst(self):
# Library we load the sub-cells from
lib = "FreePDK45_Photonic_FirstExample"
bodyname = "MMIBody"
tapername = "LinearTaper"
# Parameters used for the 4-port body
body_params = dict(lib=lib,
cellname=bodyname,
width=self.width,
length=self.length,
port_offset=self.taper_offset,
port_width=self.taper_width,
)
# Parameters for tapers
taper_params = dict(lib=lib,
cellname=tapername,
width_0=self.wg_width,
width_1=self.taper_width,
length=self.taper_length,
)
# Create constructors for tapers and body
tapers = self.add_pcell_variant(taper_params, number=4)
body = self.add_pcell_variant(body_params)
# Connect the ports
for i in range(4):
self.connect_port_to_port(body.port(i), tapers[i].port(1))
# Return constructors
return tapers, body
|
Finally create the Library so that we can call it in KLayout:
217 218 219 220 221 222 223 224 225 226 227 | class FreePDK45_ExampleLib(pya.Library):
def __init__(self):
# Set the description
self.description = "FirstExample"
self.technology = "FreePDK45"
# Create the PCell declarations
self.layout().register_pcell("2x2MMI", Ex2x2MMI())
self.layout().register_pcell("MMIBody", ExMMIBody())
self.layout().register_pcell("LinearTaper", ExLinTaper())
self.register("FreePDK45_Photonic_FirstExample")
|
And finally make KLayout compile the PCell-Library and add it to the PCell-Libraries:
230 231 | # Instantiate and register the library
FreePDK45_ExampleLib()
|
Click Run script from the current tab (Green Arrow with a vertical line at the end).
Now you can create Instances of this parametric cell in the main window of Klayout. Click on Instance and
choose the FreePDK Sample Cells [Technology FreePDK45] library from the drop-down menu. On the left of the library
drop down you can choose one of the three cells. And in the tab you can adjust parameters.
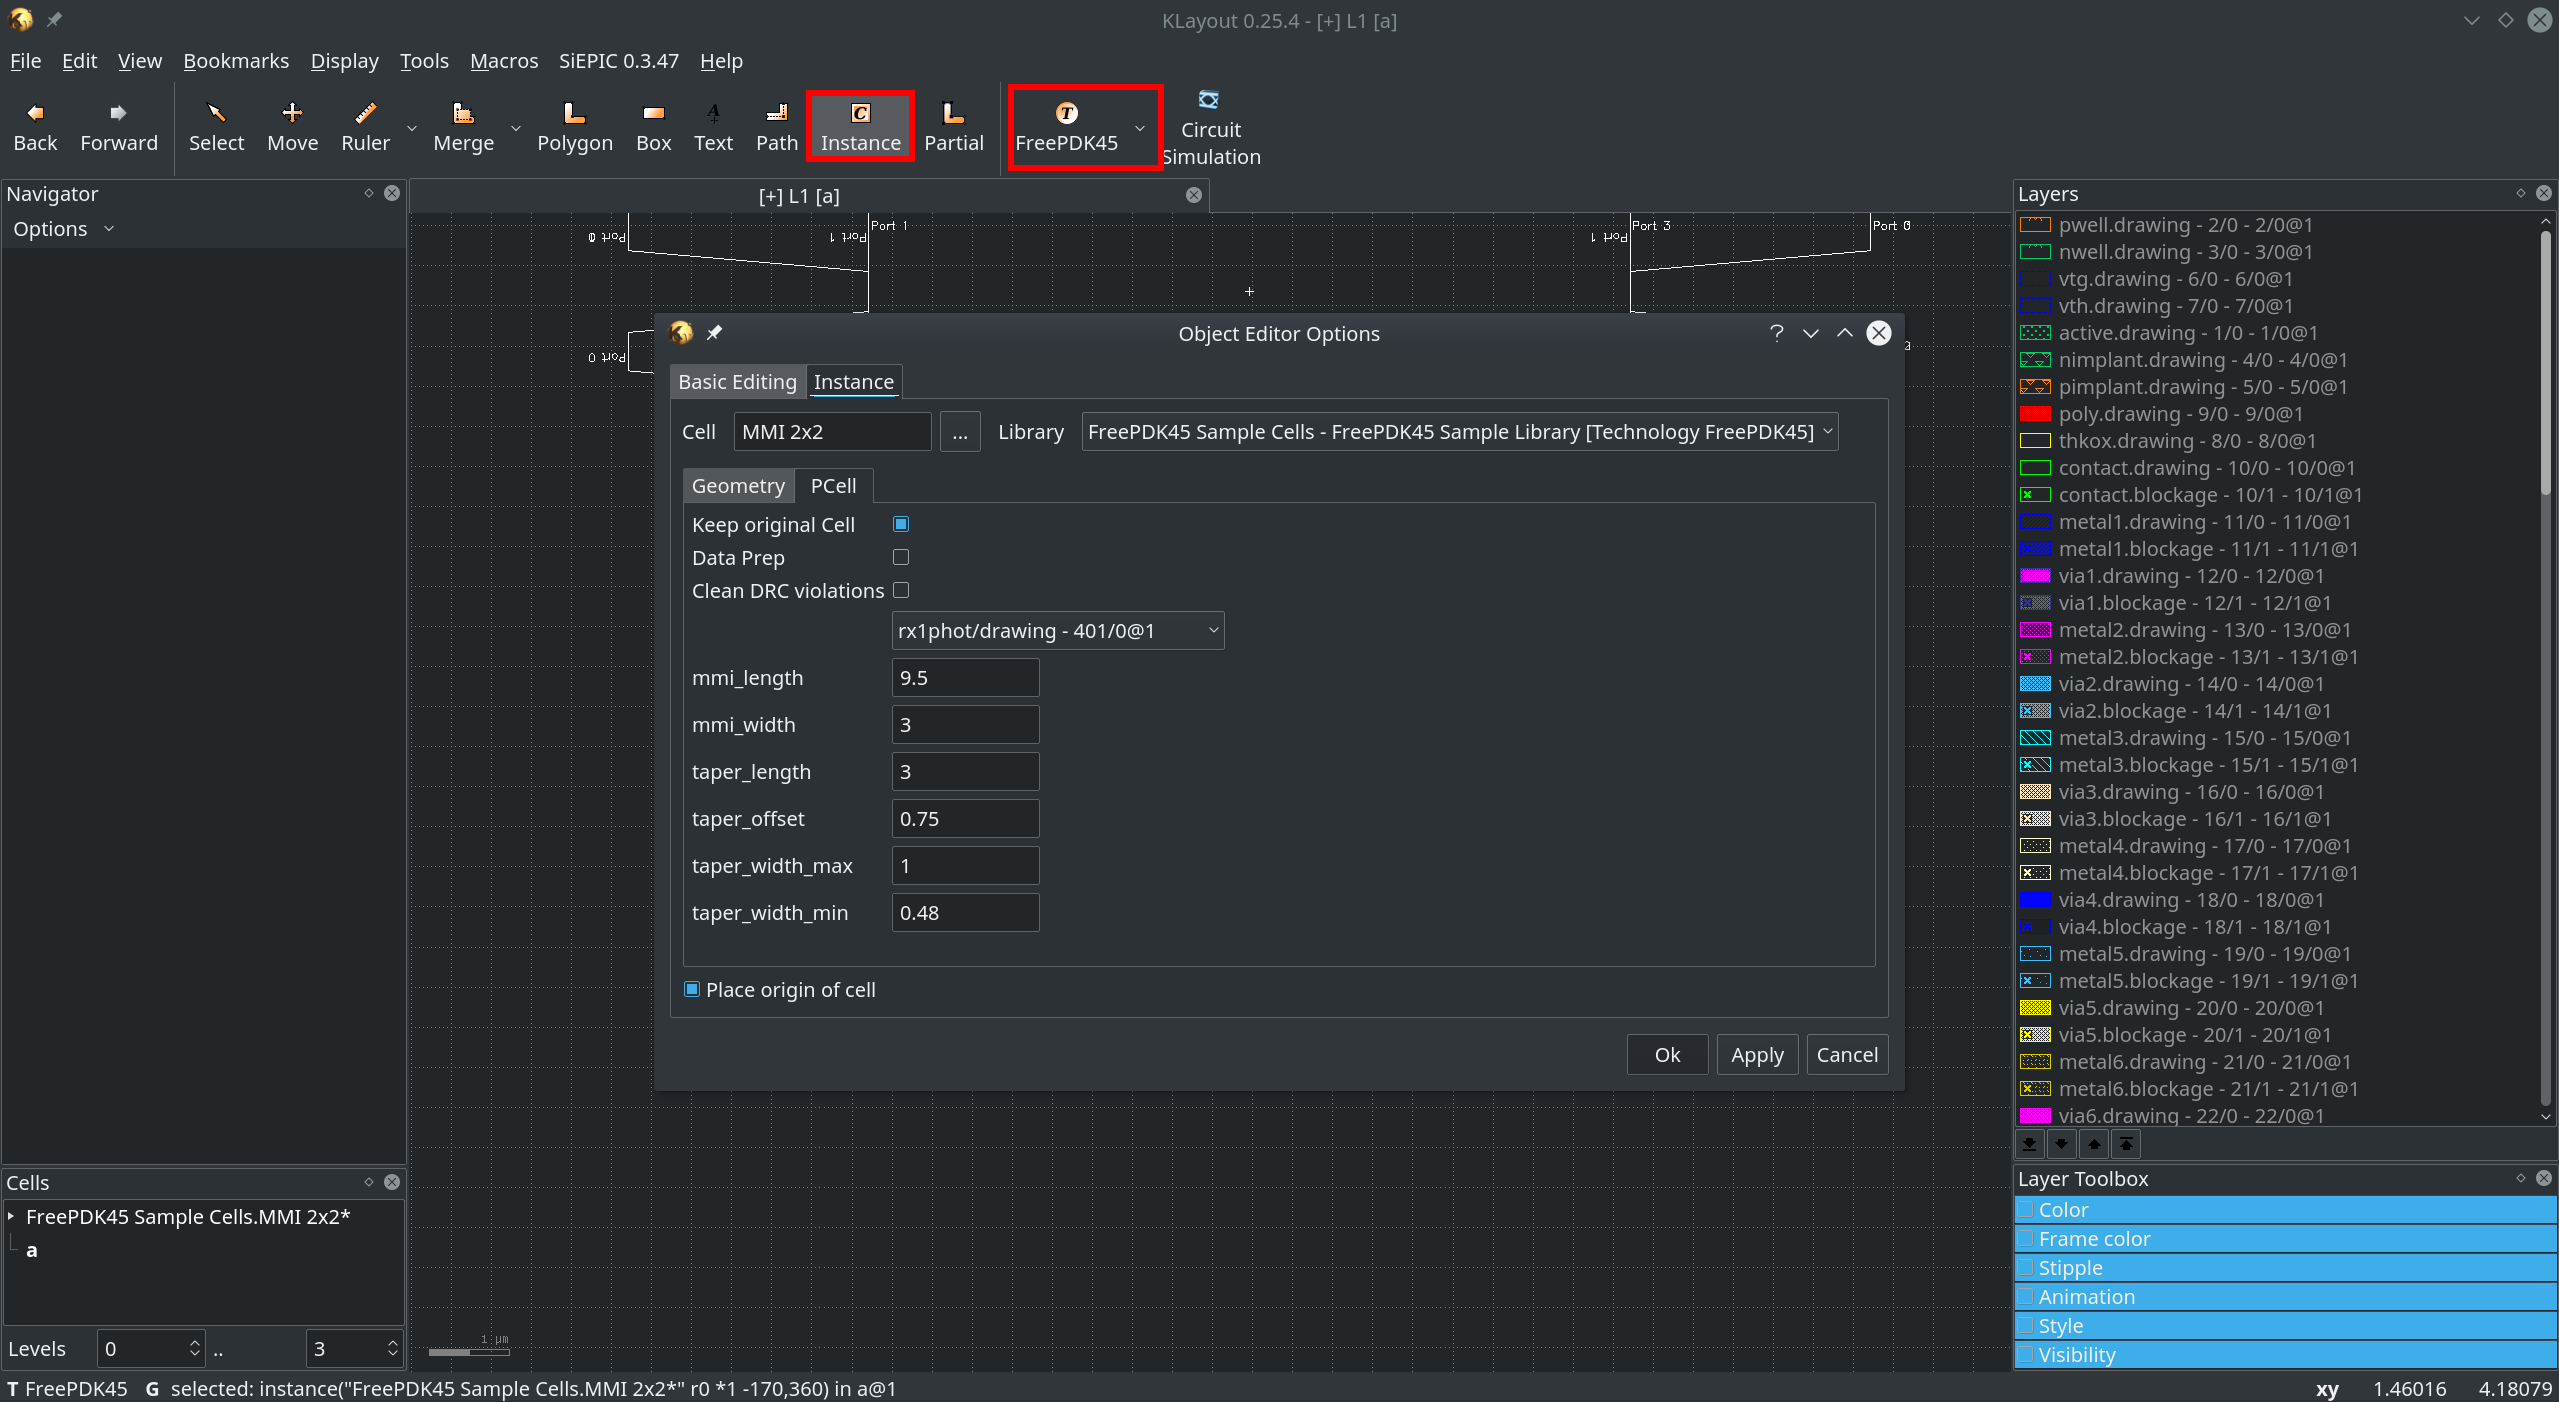
Fig. 6 In the main window click on Instance to create instances of the new Cell
If you click Ok or Apply you can place the new Cell with adjusted parameters. The first boolean determines
whether the cell should contain only dataprep & design rule cleaned shapes or all shapes. The second tells the
cell to perform dataprep and the last to make it DR-clean. The rest of the parameters are PCell specific and should
be the ones defined in the __init__(self) function of the cell definition.